POV Display
A POV (persistence of vision) display is made of a number of "pixels" (in this case LEDs) mounted in a line. The line is mounted to a rotating object, like a motor, such that one side of the line is connected to the axis of rotation and the other side of the line is far away from the axis. When the rotating object begins spinning, every location along the line then moves in a circle centered at the axis of rotation.
If one was to turn all the lights on while the pixel line was spinning fast enough, the light would blur together such that the viewer would see a number of concentric rings of light, each being traced out by the circular path each pixel takes.
Imagine that instead of keeping the lights on the same colour the whole time, one was to quickly flash one of the pixels a different colour every time the pixel line was at the same angle through its rotation. A viewer would see the same concentric rings but now with one small segment of one of the rings a different colour. By doing this constantly with every LED at a number of angles through the rotation, one can form a circular array of pixels. This array of pixels forms a screen which can be used to display images.
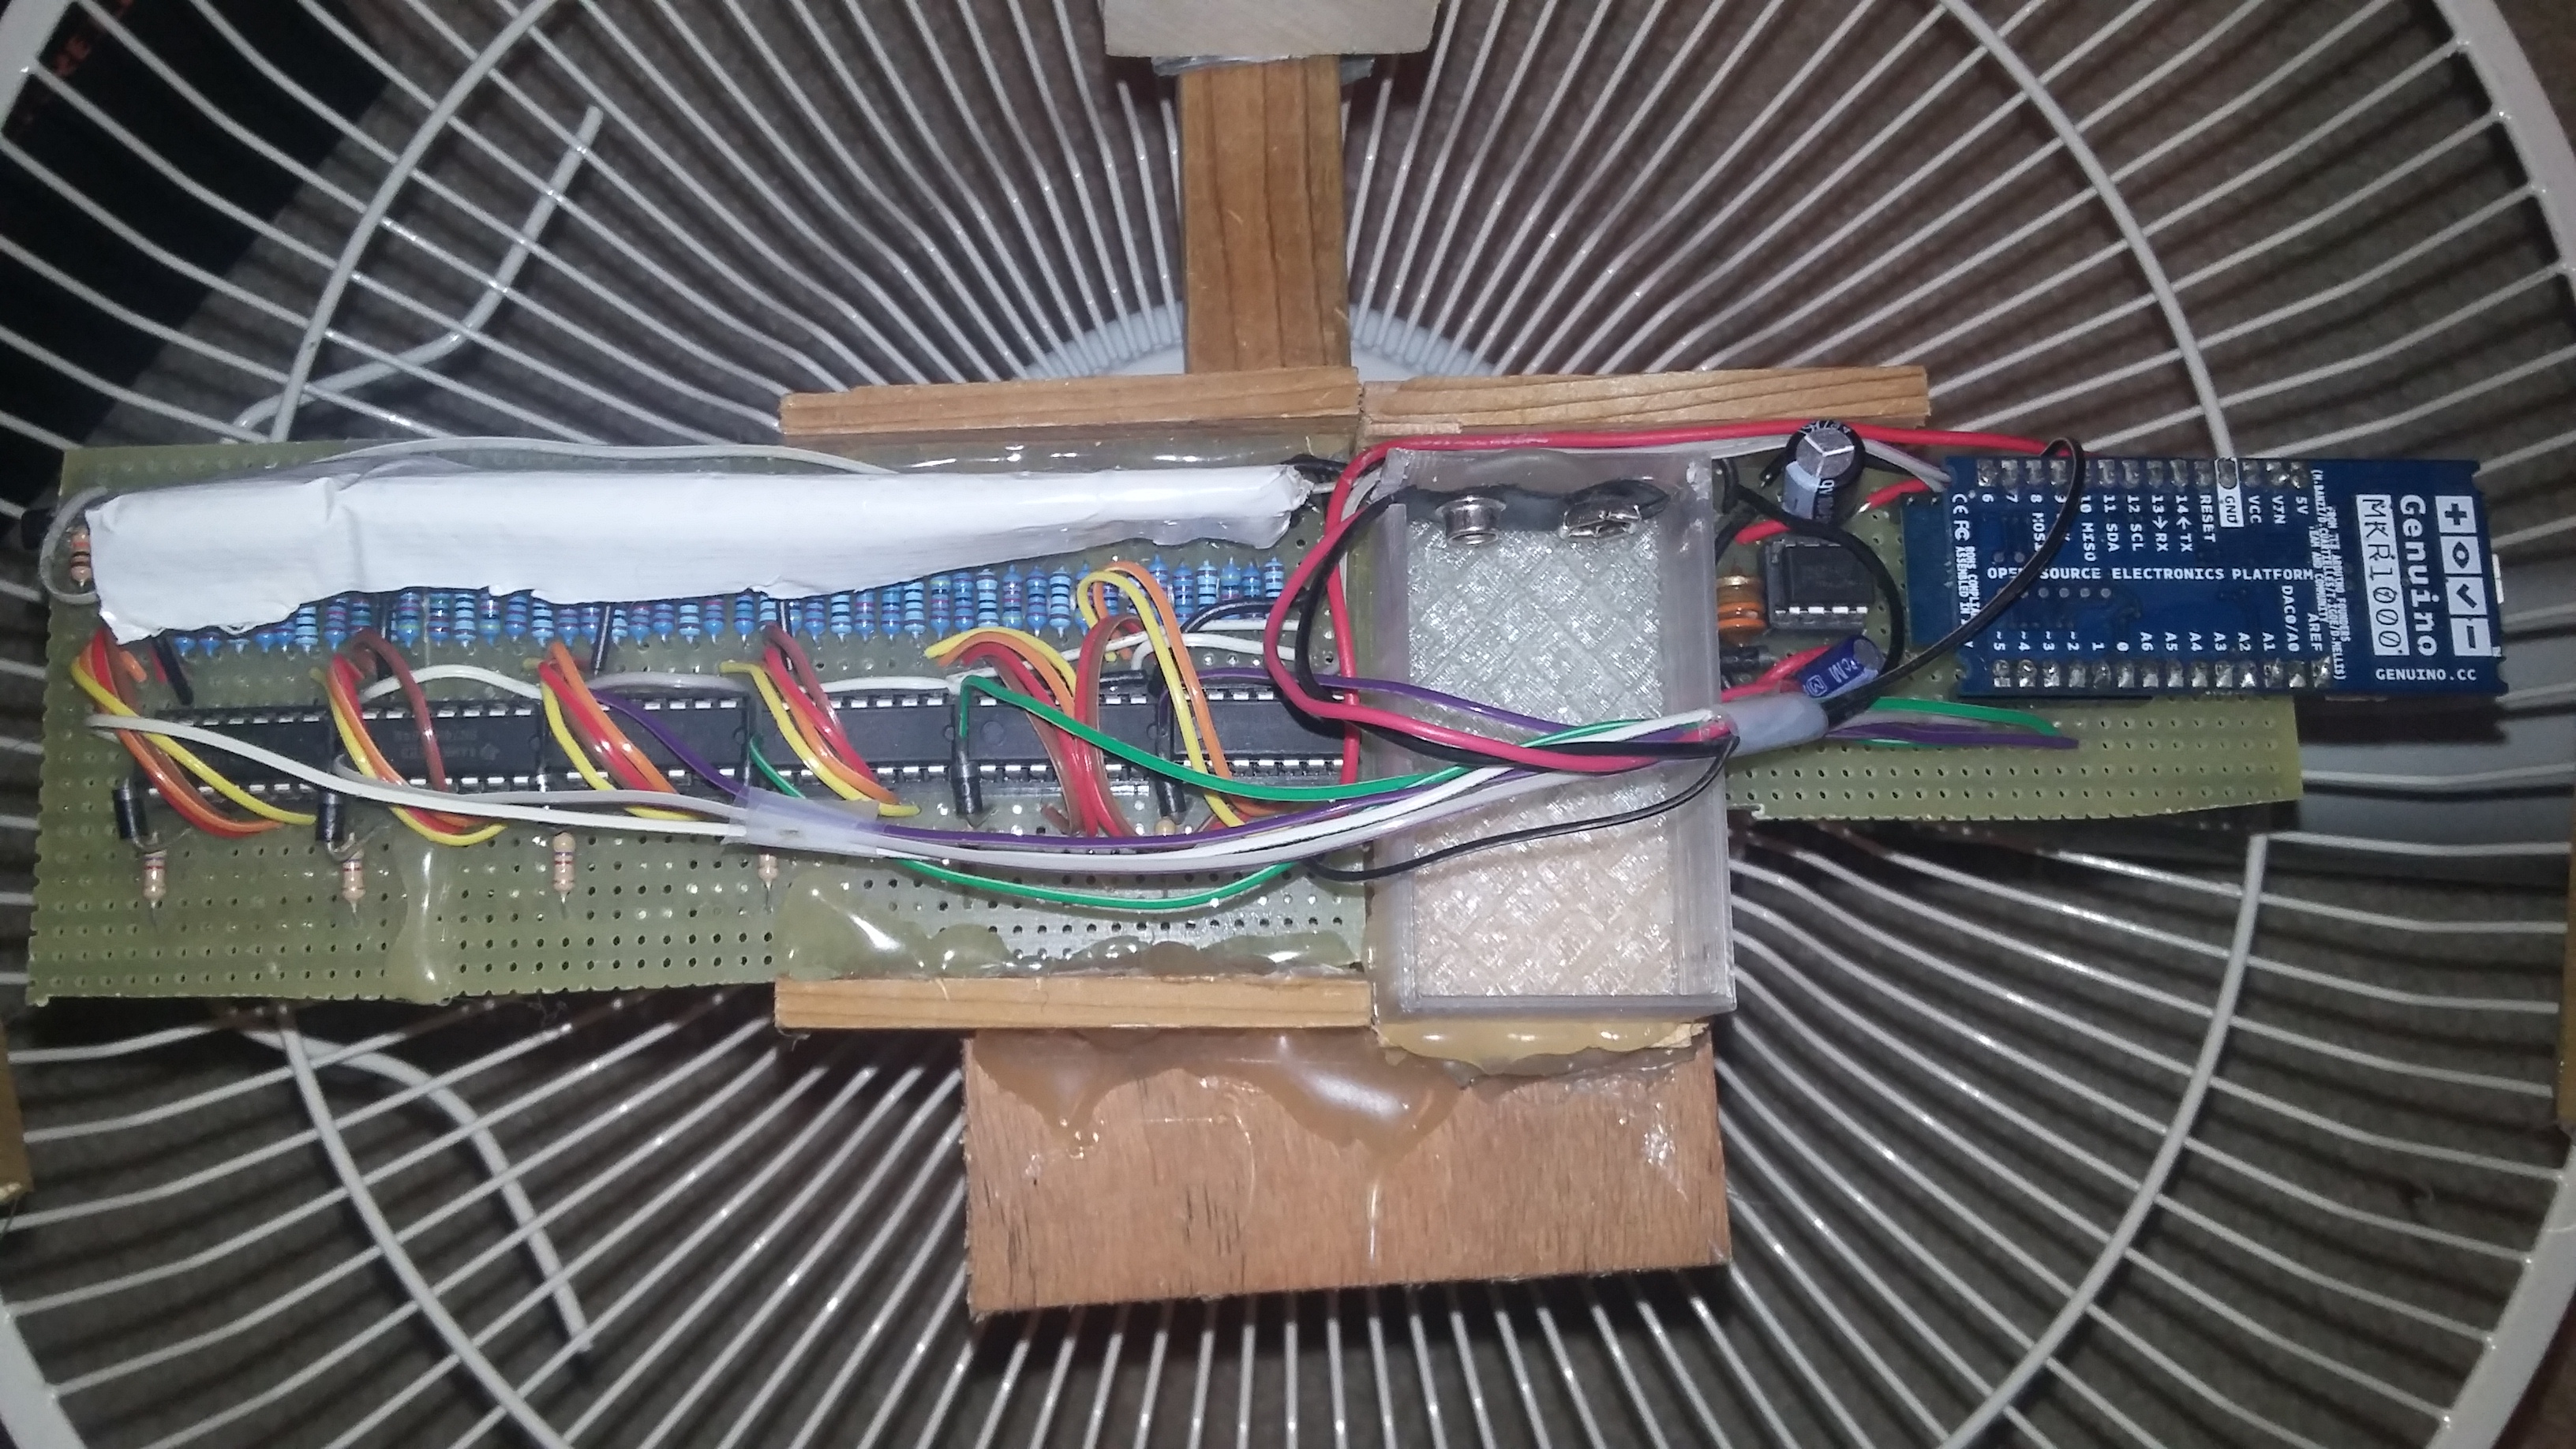
Here is a more informative video on POV displays for those curious (YouTube link)The POV display I built uses 16 RGB LEDs with data being fed to each of the red blue and green inputs to LEDs through 6 8-bit shift registers. The data going to each red blue and green input to the RGB LED is binary, thus each pixel can be one of 8 colours (black, red, blue, green, yellow, cyan, purple, white).
The display is 16 pixels in diameter, with each pixel evenly spaced apart. This about Pi * 8^2 = ~200 total pixels while spinning.
To control all these pixels, the display uses a WIFI connected micro-controller programmed in Arduino C to push data onto the shift registers using its embedded SPI bus. The micro-controller receives data over a LAN connection from a Windows Universal App written in C#. This program takes in an image (png, jpg, or bmp) or animated gif (gif), and resizes it to a square 16 pixels wide. It takes a circular cutout of this image, rounds the pixel colour values to the nearest 3 bit value, and sends the data to the display as a bit stream. If the image is an animated gif, it sends each frame of the gif in this bit stream. Settings changeable in the program's GUI allow the user to set the delay time between each frame of the gif, as well as decrease the number of frames and quality of the image displayed as the micro-controller has only around 20 kilobytes of memory for image storage.
The micro-controller used is the Arduino MKR1000, a 32-bit ARM based micro-controller with a small form factor. It has built in WIFI capabilities which are controllable via the Arduino WIFI library.
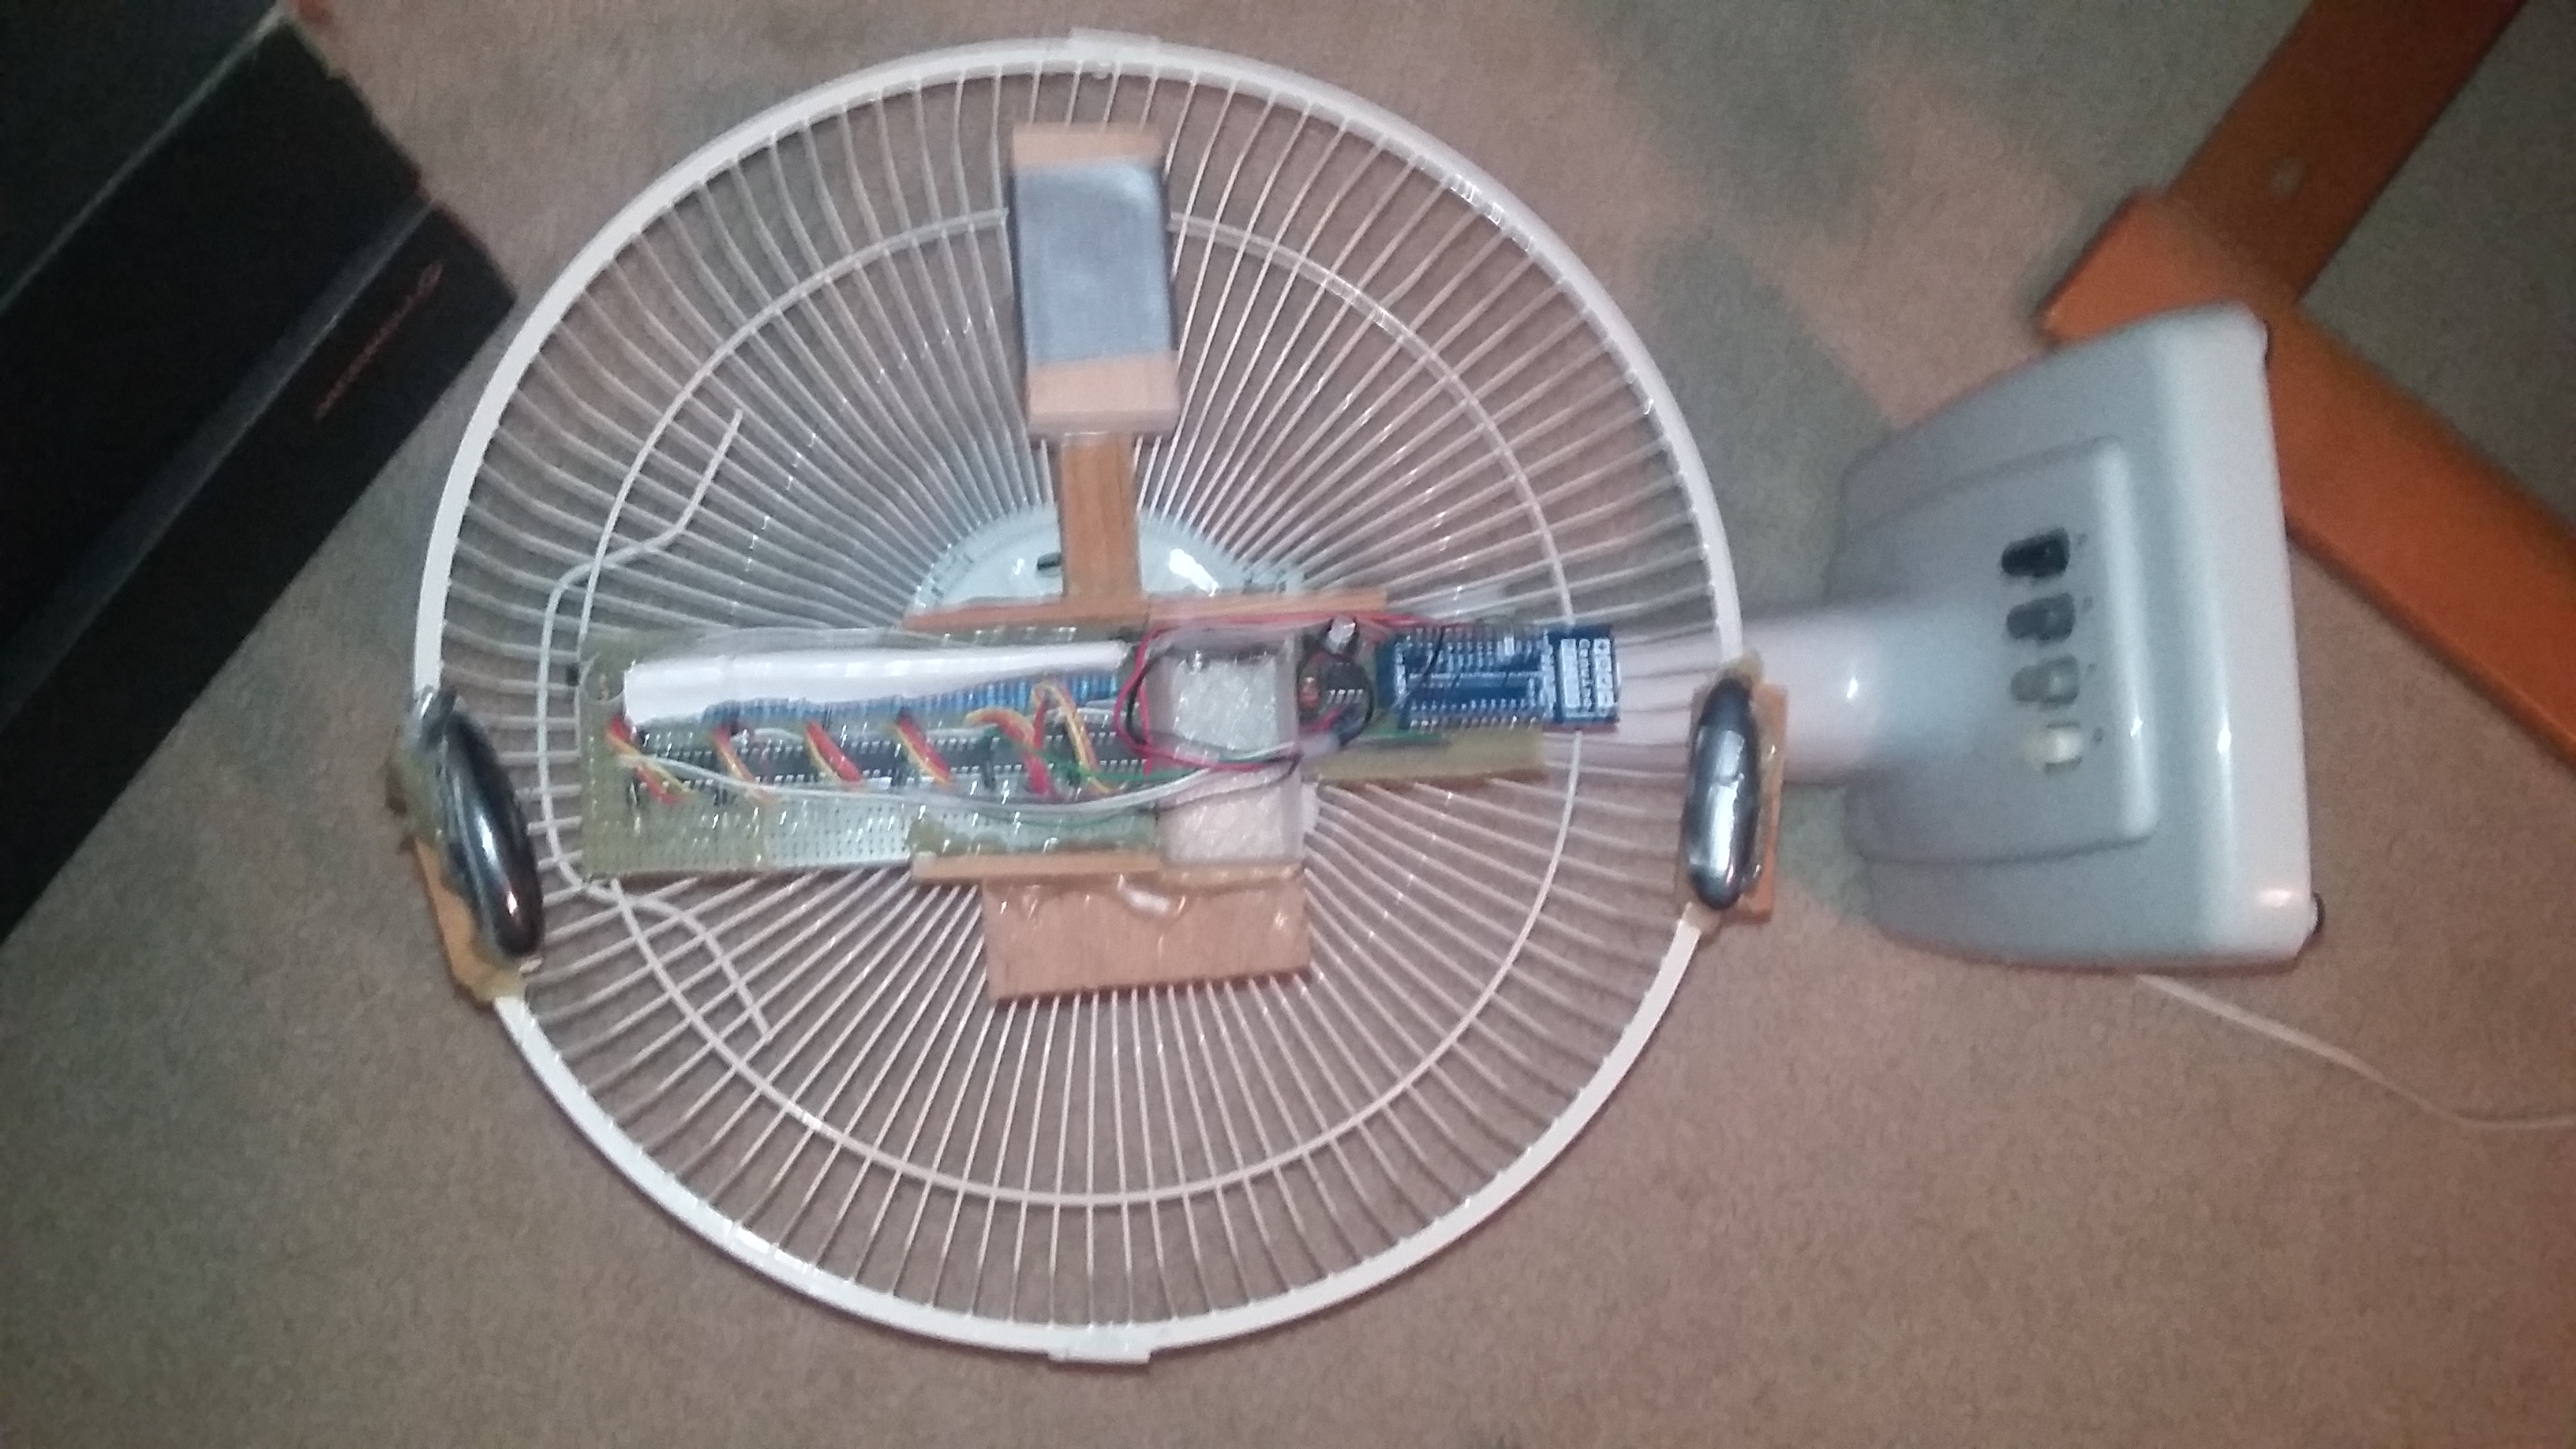
The micro-controller is soldered to a perfboard along with the power regulator, the shift registers, LEDs, and the rest of the circuit. The entire board is glued to the motor of a table top fan, which plugs into a wall socket to spin around. The entire project (apart from the fan) is powered by a 9V battery which sits in a custom made 3D printed 9V battery holder, glued to the perfboard. Tape is placed on top of the LEDs in order to dither the light coming from each of them, causing the three colours from each LED to mix together better. A block of wood is attached to the motor, away from the circuit, in order to act as a counter balance. Without this counter balance, the fan shakes back and forth quite violently while it's spinning.
In order to accurately determine how long a rotation is, a hall effect sensor is used. The hall effect sensor detects the presence of a magnetic field and toggles one of its pins to signify this. Two opposing constant magnetic fields are established with two permanent magnets glued to the edge of the fan. The hall effect sensor's output toggles each time it comes in contact with one of these fields, which triggers a hardware interrupt to reset a timer counting clock cycles and to read the last timer value. This value corresponds to how many clock cycles have passed since the last reset, determining the length of a rotation.